
Steps to Writing a Google Review
- Step One: Open Google Maps and search the business name
- Step Two: Rate and write a review
- Step Three: Connect the email of your preference
- Step Four: Share relevant images and hit publish
Step One
Click on the review link on the physician’s review page or open Google Maps and search the doctor’s name
Whether your users are on their laptop or computer or using their mobile devices, Google Maps is an easy way to do a local search and scan for negative reviews.

On the browser, head over to Google and then navigate to Maps in the dropdown list where you’ll see popular applications like Google Drive.
If you’re on an Android mobile device, Google Maps will be part of your default apps and accessible with one click. If you can’t find it, search and download it via the Google Play store or App Store! It’s as simple as that.
Next, search for the business name and click it.
Pictured below is an example of a Slocum-Dickson listing. As you can see, the map provides the details of the business name, address, opening times, and other critical information.

Step Two
Rate and Write a Review
Navigate to the starred review section and you’ll see five empty stars on display, waiting to be filled to your heart’s content.
Assign a rating that fits the service you received after which, you have the option of elaborating on your customer experience if you so wish.

As you may have noticed, you may have reached this step without a single barrier stopping you from rating and filling out your own review. This may be the case if you already have a non-Gmail address associated with your Maps account.
If not, you may get a prompt through a pop-up box to sign in.
As you may have noticed, you may have reached this step without a single barrier stopping you from rating and filling out your own review. This may be the case if you already have a non-Gmail address associated with your Maps account.
If not, you may get a prompt through a pop-up box to sign in.
Step Three
Connect the Email of Your Preference
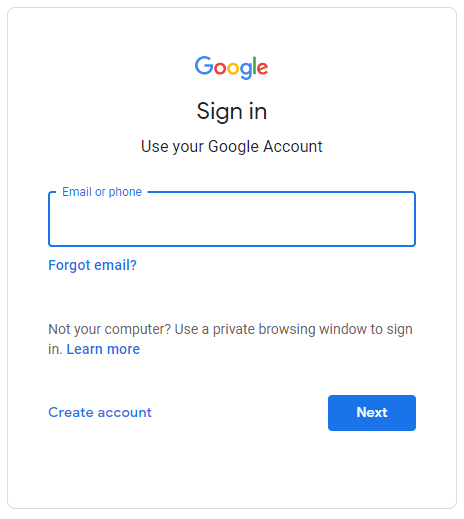
If you’re still looming over that seemingly intimidating pop-up asking you to sign in, don’t worry. Go ahead and click “Create account.”
But instead of creating a Google account, you’ll see another handy alternative on the next page.
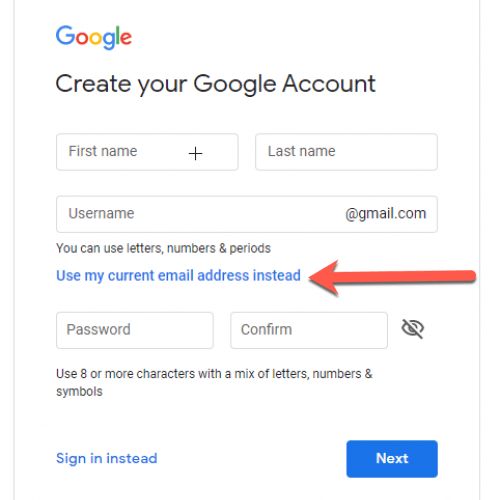
Click the option: “Use my current email address instead” and you’re good to go! If you don’t have a Google, YouTube, Gmail account. You may use your own email address to create a Google account. Once your account is created, you can leave Google reviews. Just follow the on screen instructions/prompts to create your account.
You will then get redirected back to the reviews page and be free to proceed with your Google review no matter the email ID you have.